Seamless Master Data Publishing:
Confluent Cloud Integration Simplified with Advantco KAFKA adapter
In this tutorial, we will go through steps on how to send IDOC from SAP to Kafka broker which we use Cloud Integration as the middleware and Confluent Cloud for the Kafka broker.
KAFKA Adapter Demo
Before starting, let’s outline the data flow. SAP sends out an IDOC in XML format, the middleware receives it and then forwards it to Advantco Kafka adapter, the adapter converts the payload from XML to JSON format and serializes it to AVRO based on the predefined AVRO schema. The final step is to send/produce the message to a topic on the Confluent Cloud. Here are all steps:
Step 1: Generate schemas
Step 2: Create a Kafka topic
Step 3: Get information to access the Kafka broker
Step 4: Get information to access Schema Registry
Step 5: Create material user credentials in the middleware
Step 6: Create a Kafka connection in Advantco Kafka Workbench
Step 7: Create an integration flow and config the Advantco Kafka channel
Step 8: Test the integration flow
Prerequisites
- Trial of Advantco Kafka adapter
- Get a free Basic cluster of Confluent Cloud
- SAP Integration Suite which includes Cloud Integration
- SAP system where we send IDOC out. The configuration for sending out IDOC to Cloud Integration is in place.
Step 1: Generate schemas
We are going to use DEBMAS07, so open WE60 in SAP and then enter IDOC DEBMAS07, and then go to the menu Documentation > XML Schema to download XSD of the IDOC.
%20(2).webp?width=600&height=440&name=1-1%20(1)%20(2).webp)
We have the XSD schema of the IDOC, now we will generate AVRO schema from the XSD file. After installing Advantco Kafka adapter, we can access the Advantco Workbench. We use the workbench to generate AVRO schema from XSD schema.
Now we have the AVRO schema, we will use it for the next step of creating a topic on Confluent Cloud.
.webp?width=600&height=307&name=2-1%20(1).webp)
Step 2: Create a kafka topic
Log into Confluent Cloud after creating a Basic cluster. Create a new topic.
.webp?width=600&height=384&name=3-1%20(1).webp)
Click on Create topic.
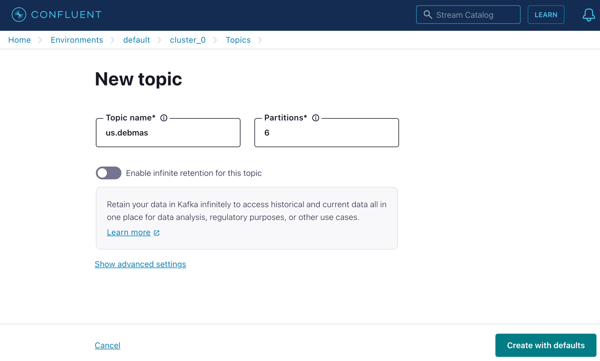
Create with defaults.
Select Schema > Value to set schema for Value. Click on “Set a schema” and input the AVRO schema we generated in step #1.
Note: a kafka message includes 3 parts of Value, Key and Headers. Value is the message body where we store the IDOC message.
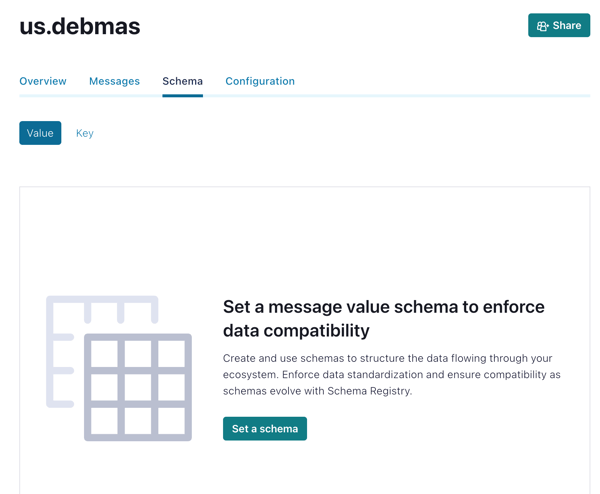
Step 3: Get information to access Kafka broker
3.1 Get the endpoint of bootstrap server of Kafka broker
Copy Bootstrap server, we will use it later.
.webp?width=600&height=375&name=7-1%20(1).webp)
3.2 Create API Key to access Kafka broker
.webp?width=600&height=368&name=8-1%20(1).webp)
Copy Key and Secret, we will use it later to access kafka broker.
.webp?width=600&height=414&name=9-1%20(1).webp)
Step 4: Get information to access Schema Registry
4.1 Get endpoint (http URL) of the Schema Registry
In Confluent Cloud, click on Environment > default, and at the right bottom of the page (as in the screenshot above), copy the endpoint URL. We will use it later in the next steps.
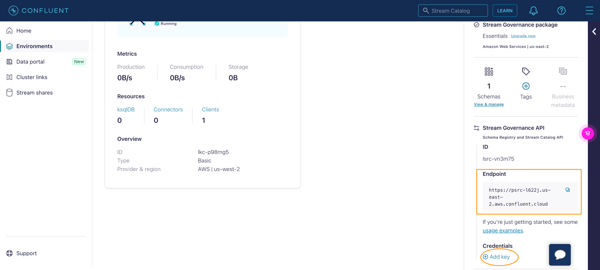
4.2 Create API Key to access Schema Registry
In Confluent Cloud, click on Environment > default, and at the right bottom of the page (as in the screenshot above), click on “Add key”.
Click on “Create key”
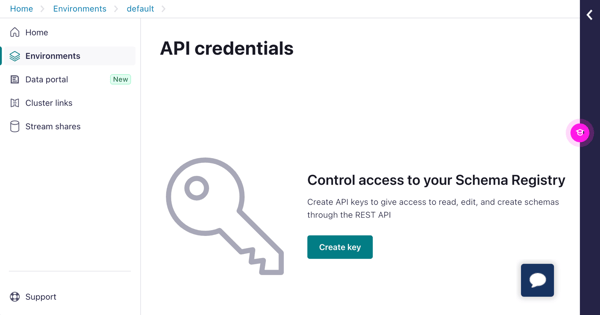
Copy Key and Secret, we will use it to access Schema Registry later.
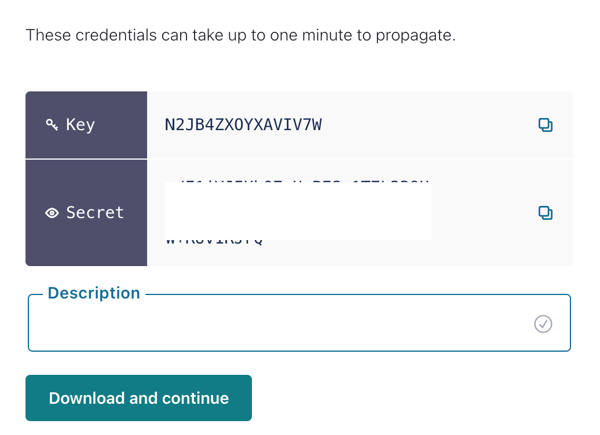
Step 5: Create material user credentials in the middleware
Create 2 material user credentials, one for the API key to access kafka broker (step 3 – 3.2) and other for the API key to access Schema Registry (step 4 – 4.2).
Open the middleware > Monitor (Integration and APIs) > Security Material > Create > User Credentials
.webp?width=600&height=334&name=13%20(1).webp)
Step 6: Create a Kafka connection in Advantco Kafka Workbench
Open Advantco Kafka workbench, click on “Add connection”
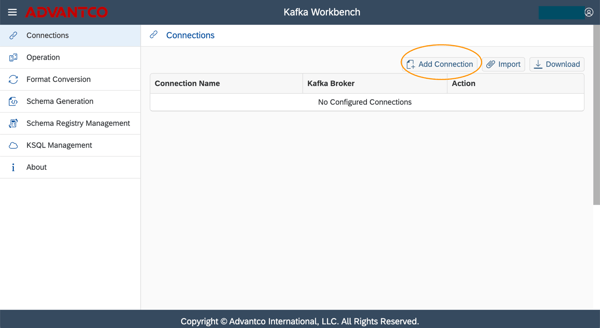
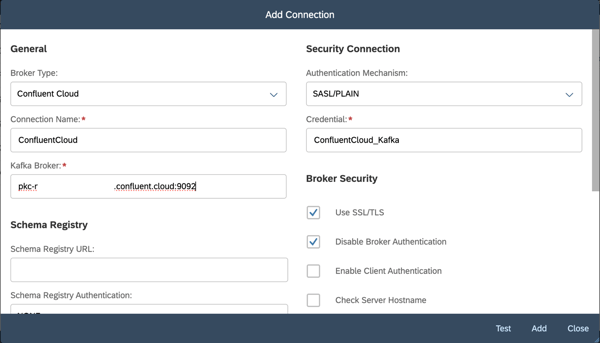
Use the bootstrap server (step 3 – 3.1) and the user credential we created in step 5. Click on Test to make the information is correct and then click Add.
Note: we have a connection named “ConfluentCloud”, we will use it in the channel configuration later.
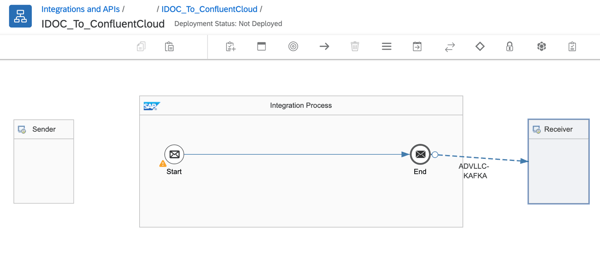
Step 7: Create an integration flow and config the Advantco Kafka channel
Use “ADVLLC-KAFKA” adapter and Message Protocol as KAFKA PRODUCER API for the receiver channel.
From the connection tab, change the Configuration to “Lookup By Key” and input “ConfluentCloud” as created from the previous step.
.webp?width=600&height=520&name=19%20(1).webp)
Move to the Processing tab, and input “us.debmas” for the topic name. This is the topic we created in step 1.
.webp?width=600&height=538&name=20%20(1).webp)
Still in the Processing tab, go down to the part “DATA FORMAT CONFIGURATION”, and then change Format Type to “Avro Format” and Schema to “Schema Registry”.
Input Schema Registry URL (value from step 4 – 4.1) and Credential (we created in step 5). For the field “Record Data Schema Subject” it’s a combination of the topic name and “-value”, so the value for this field is “us.debmas-value”.
Leave all other fields with default values.
.webp?width=600&height=489&name=21%20(1).webp)
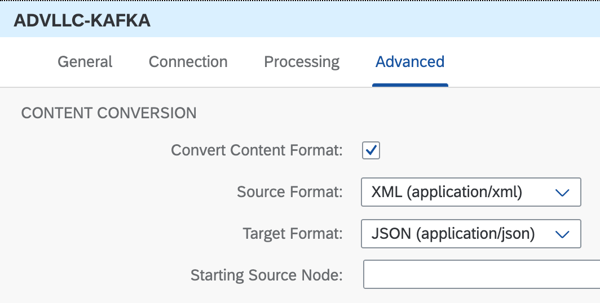
Move to Advanced tab, and go to part “CONTENT CONVERSION” to convert the XML to JSON.
That’s it for the Advantco Kafka channel configuration. Let test it.
Step 8: Test the integration flow
Send a DEBMAS from SAP with BD12.
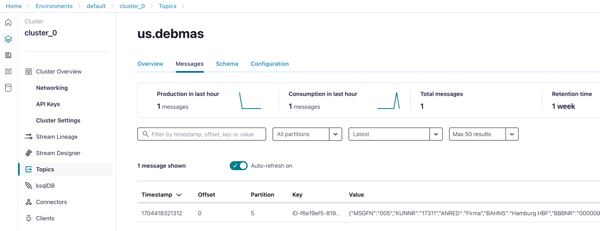
Validate the IDOC message in the topic on Confluent Cloud.
Ready to learn more?
We're happy to answer all of your questions.
.png?width=900&height=186&name=Advantco%20logo%20AAC%20V1%20Ai%20file%201%20(1).png)
.png)
.png)


